OBS Studio: Open-source software for video recording and live streaming
From the HN Thread
- There are a lot of tutorials around learning OBS. One of the best ones that I’ve come across is EposVox’s OBS Studo Master Class 2018. It helps you figure out what you want to learn and covers a large swath of the various OBS functionalities. EposVox’s OBS Studio Master Class 2018 YouTube Playlist: https://www.youtube.com/playlist?list=PLzo7l8HTJNK-IKzM_zDic…
- Instead of streaming the entire desktop (or a portion of it), you’ll actually want to set up the [“Game Capture” source](https://obsproject.com/wiki/Sources-Guide#game-capture), and configure it to automatically attach to any fullscreen application. Then add an audio stream, and you’re good to go.
- OBS is commonly used for video game streaming, but it’s a great tool for any scenario where you need to take live audio and video from different sources and display them at the same time or transition between them.
My Notes from the tutorial
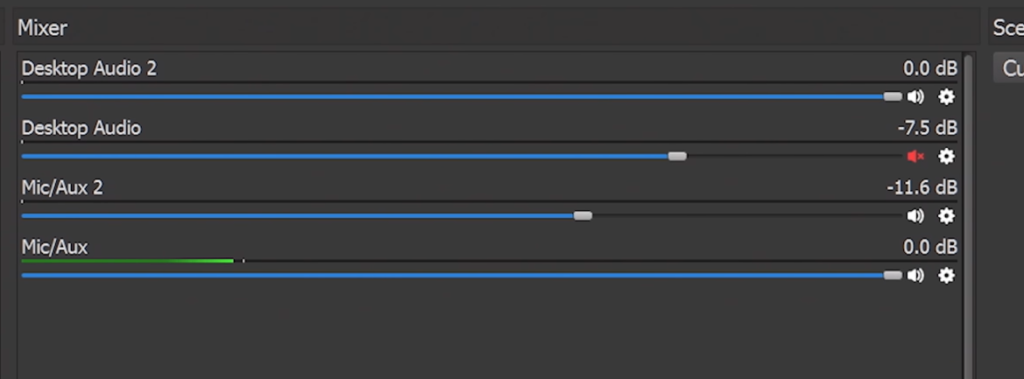
Audio Mixer
- Audio should never go in the red
- Click the gear button to assign channels to audio sources-> otherwise all audio sources will go to all tracks
General Settings:
- Output
- Output Mode: most of the time you want to change this to advanced
- Recording Format: although mp4 is the most compatible format, mkv is the better choice, because it will not be corrupted if the system or software crashes.
After recording convert the mkv to mp4 via File->Remux recordings
- Audio: setup your devices here
- Hotkeys: Setup hotkeys here
Autoconfiguration
- Handy tool to optimize your OBS config for either streaming or recording
Profiles
Use different profiles to store different setting presets for different use cases. For instance a profile for recording, for streaming, for webcam recording etc.
Profiles do affect all kinds of general settings, like bitrate, resolution etc.
They do not affect your audio devices (mic input, dekstop sound etc). You can use scene collections for that
Scene Collections
- Scene collections affect your scenes, sources and audio devices.
- You usually want a specific scene collection for a specific profile and name them similarly
- Note: the resolution is determined by the profile, so use appropriate resolutions in your scene collection
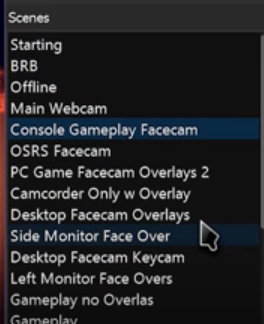
Scenes & Sources
Scenes separate different source combinations. Why would you need multiple scenes? See this Twitch streamer: he uses a ton of them, for afk streaming, scenes that can be nested, gameplay with or without overlays, different sized webcamviews ETC ETC
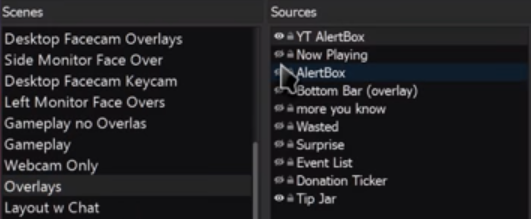
Sources
- Audio input capture, typically a mic
- Audio output capture – for instance from you audio interface
- Browser -> url input, often used for follower alerts and other popup elements from sources suchs as streamlabs
- Color -> solid color background, or for some advanced masking /chromakey
- Display capture
- Game capture -> Games or other full screen applications
- Image -> overlays, watermarks etc
- Slideshows > often used for afk stream (be right back)
- Media Source adds a music or video file.
- To hear the source, you need to enable audio monitoring for the source
- Scene source -> Enables nesting of scenes. Important part of video production
- Text source -> Add text, or load it from a text file and keep it updated
- Video capture Device -> webcams and video capture cards
- Window capture -> capture only the window and not the desktop. The window can be moved around or hidden without problems
Tips:
Existing sources from other scenes can be added quickly by choosing ‘existing sources‘ when adding a new source
Transparency of image or scene sources can be set with filter -> color correction
Resizing or repositioning sources
- click on the Source – either in the video preview or in the Sources list – and a bounding box will appear.
- Click and drag to move it around,
- Use the corners to resize.
- Holding Alt while doing so will crop the Source, as desired.
- Use the lock symbol next to individual Source names to lock a Source in place. Use this all the time!
Hotkeys
In the settings you can setup all kind of hotkeys for scenes or sources.
(This gets even better with a macro keypad such as Stream deck)
Nesting Scenes
Particular useful as workaround to the sources being global . If you crop your webcam source, it will be cropped everywhere. Instead of creating copies of the webcam source, you can just create a scene with the webcam, and than add this scene to other scenes and crop it as needed
Also useful for adding global overlays (or backgrounds) that you want to be seen on multiple other scenes. Just make a scene with all your overlay text and what else and nest the scene in all other scenes. Switching a source will now pop up in all scenes.
Optimize video
webm is very optimized. you can use the tool webmbro to convert your video files to webm. When you run the tool you can also change the resolution or bitrate if you want. Don’t forget to enable audio!
Audio and Mixing
Setup:
Start by setting up your devices in Settings->Audio. You may have only a mic and speakers.
Record to different tracks
- Go to settings-> output.
- Choose advanced
- Check recording tab
- A standard setting is to check 2 or 3 audio tracks here, but this depends on the amount of audio sources you want to separate
- Now the important part if you want the audio sources to be recorded to separate tracks: go to your audio mixer
- Click the gear button-> advanced audio
- Change the default settings so that the different audio devices have at least one separate track for themselves. A common track is also needed when you are streaming (since you can only output one track when streaming)
- Test your record levels, so that none of the tracks goes into the red
- Recording multiple tracks is only possible with some video formats, such as mkv and mp4
- Most media players can’t play all audio tracks at once. In VLC player you can choose the track you want to hear.
Use Audacity to open a mp4 file. the dialogue will ask you which audio track you want to load. repeat until you have all the audio tracks aligned in audacity. Now you can start balancing the sound.
Audio Filters
You can apply filters to your audio devices. Such as a compressor or noise suppressor to make your mic sound better. Or even VST plugins for all kinds of effects
The order of filters (Processing chain) should be:
- Noise Removal
- Equalizer
- Compressor
- Final Gain
Audio monitoring
- monitor only loops the audio to you headphones
- monitor and output loops it also to your stream -> make sure to unmap the audio track otherwise the mic will go to the stream twice
- Setup your monitoring device in settings-> audio
- Delays can be applied with the Sync offset

Keep you audio Clean
Static, hissing, electrical hum are very annoying. How to clean your sound:
- Isolate your hardware
You hardware (mixers etc) need to be isolated from the outlet, or at the very least the power strip, where other electrical devices (such as your computer or lamps) are plugged in. - Use a power conditioner
A sort of power strip that is designed to isolate the plugged in devices - Ebtech HumX
Quite expensive - Ground loop isolator
Reduces static when connecting 3.5mm jacks to computer mixer etc. Note: they are 1-directional